How to Remove Wall & Floor Tiles
Is your bathroom or kitchen in need of a refresh? Are you tired of looking at old, drab tiles that have gone out of style? It might be time for a change! When retiling your space, you will need to remove the old tiles first. Fortunately, this is an easy job once you know the required steps to take. Our below guide will teach you how to remove old tiles from your wall and floor, so you can start renovating your space sooner rather than later. However, we also recommend talking to a professional tiler before you begin.
Safety is key
When you start chipping away at tiles, it’s common for shards of ceramic, porcelain, or glass to fly around the room. For this reason, you must protect yourself from stray pieces of tile. Make sure you use safety goggles and protective gloves to protect your eyes and hands. It also helps to get a friend or someone in your household to help catch the larger tiles as they fall from the wall, preventing them from landing on top of you. They should also wear goggles and gloves to protect themselves.

Protect your surfaces
As well as protecting yourself, it’s also important to protect the space around you. If you are removing wall tiles over a bath, shower tray, basin or countertop, falling pieces of tile can cause them to get scratched. So before you begin, make sure everything is covered up. Cardboard is ideal for protecting these spaces from falling tiles. You could also drape an old sheet over this for extra protection and to make tidying up easier.
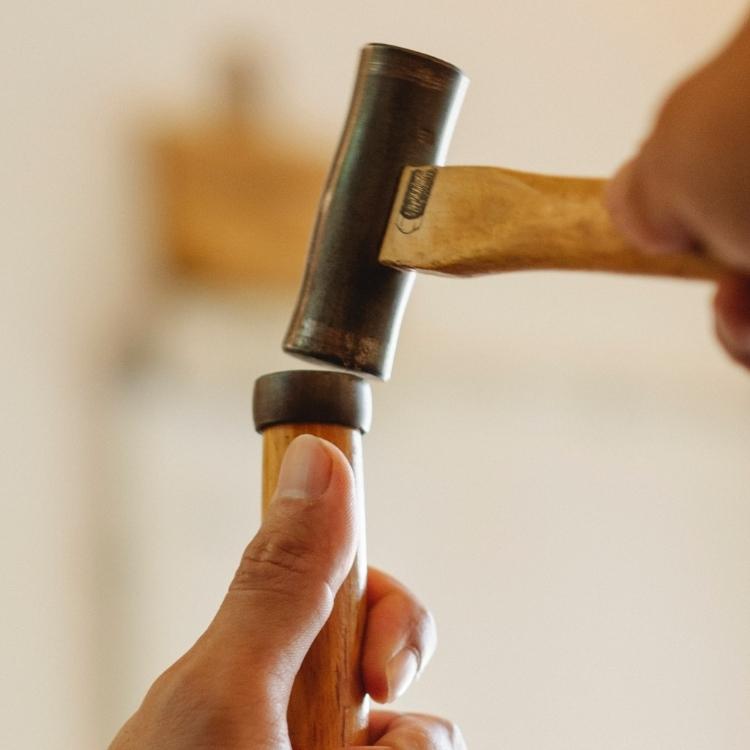
Use the right tools
Now that your room is protected, it’s time to tool up! To remove tiles, you only need 2 tools – a relatively thin chisel and a hammer. If you don’t have a chisel, you could try using a large screwdriver that’s sharp-pointed and flat-headed.
Where to start?
When you start to remove the tiles, the hardest part will be removing the first tile. This is because there is usually no easy access from the sides. Using the butt of the hammer, prod the corners of random tiles. Try to feel for a loose one, as this will be easier to remove.
If you do find a loose tile, prize it out with the chisel. If you don’t find a loose one, you will need to break one. To do this, simply put the chisel in the middle of any tile and hit it with the hammer. This should shatter the tile, allowing you to remove the individual pieces. This is also very satisfying!
Keep going!
Once you’ve removed the first tile, it will provide a gap for you to start removing the rest of the tiles with ease. To proceed, sit the chisel against the wall or floor with the point tucked behind the tile you want to remove. Tap the chisel with the hammer so that it’s nicely tucked behind the tile. Next, pull the chisel slowly towards you, so that it prizes the tile from the wall or floor.
If you are removing tiles from the wall and have someone to help you, ask them to catch the tiles as best as they can. This will reduce the chance of damage to the surface below as a result of falling tiles.
Next, remove the adhesive
Once all of the tiles have been removed, try to get as much dried adhesive off the wall or floor as possible. This should come away pretty easily by tapping it gently with the chisel and hammer. Removing the old adhesive should give you the flat, sound surface you need for applying your new tiles.
Cleaning up
Once you’ve finished removing the tiles and adhesive, it’s time to tidy up. If you used sheets to protect your surfaces, they should have caught most of the debris. This makes the cleanup much easier. Put all the waste into a cardboard box, as bin bags might rip open due to sharp pieces of tile. You can dispose of everything in your regular waste bin, or take them to your local household waste and recycling centre. Use a dustpan and brush to pick up any remaining tile and adhesive. To finish, vacuum the whole room to make sure you’ve cleaned up all residue and pieces of tile.
You’re ready for retiling!
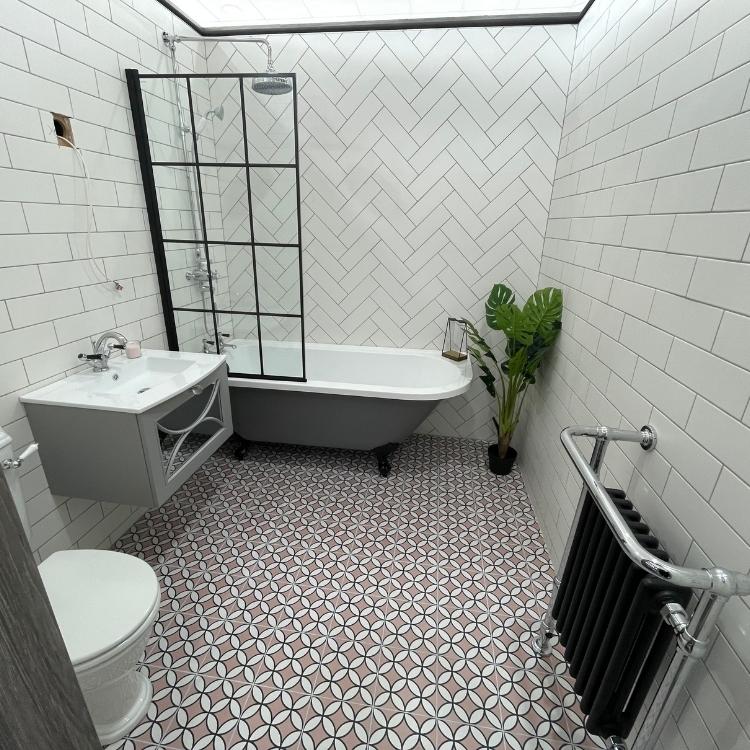
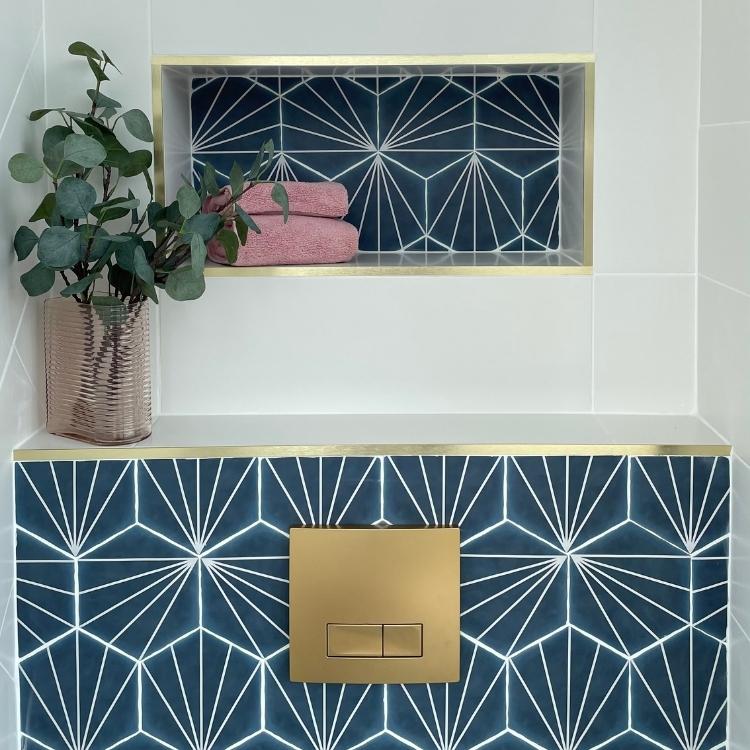
Once you’ve cleaned up, you will be left with bare walls or floor space that are ready for tiling. You can browse our wide range find the perfect tile for your space. Not sure what style to go for? Let us offer some inspiration:
- Breathe new life into your bathroom or kitchen with bold colour. This is a wonderful way to spruce up your space, creating an energetic feel and cheerful ambience. Bold colours will look particularly striking as an accent wall or border, balanced with a more understated tile such as plain white or cream.
- Bring nature indoors with organic, neutral tones such as stone or wood effect. This will create a calm, cooling environment in which to unwind – perfect for creating the feeling of a high-end spa at home.
- Of course, you can’t go wrong with classic white. White will make your room feel bigger, brighter and less cluttered. An all-white bathroom does not have to be boring either; a white marble tile will add interest, warmth and luxury to your space.
For more style advice and ideas, browse our blogs. Here, will learn how to nail a range of different trends, whether you are looking to tile your bathroom, kitchen floor or backsplash.
Retiling
Before you begin tiling, you will need to prepare your surface. Check that your wall or floor is clean, dry, level and free from damage, debris and protruding obstructions such as screws. Give any lumps or marks a rough sand if they’re large enough to make the surface uneven.
For an in-depth guide to tiling walls and floors, check out our blog on Everything You Need to Know About Fitting Tiles. As always, we advise consulting a professional tiler too.
Ready to give your space a makeover? For help and advice on all things tiles, book an appointment for one of our showrooms on the island of Ireland. Our fantastic team will be happy to show you the tiles we have on display and an assist you with any queries you have. You can also Contact Us from the comfort of your own home with an questions you have before ordering your brand-new tiles for delivery.